Wednesday, September 14, 2016

Tuesday, March 10, 2015

173) Sight Word Magnetic Poetry Set


Suddenly the Bee is a full on reader! She has been able to read for a little over a year, sounding out letters and reading short books but in the last few months she has become fluent. Reading everything, everywhere all the time. It still sometimes catches me off guard when we are out somewhere and she will ask me a questions about a sign she just read. With the Bean not far behind this seemed like a good time to make something which has been on my to make list for a long time, a magnetic poetry set. I  am sure I saw this idea somewhere but honestly have been thinking about it so long I can't remember where I saw it. I have seen lots of cool magnetic poetry sets but wanted to make one really geared towards the early readers in my house. So I started by finding a few sight word lists and used these as the basis for our list of words. I also added some of the spelling words the Bee has had this year as well as some family members and other words that are important and meaningful to the girls. Once the list was ready we had a lot of words and were ready to make them into magnets.


Coming up with the list of words was probably the hardest part of this project. Actually making the magnets was super simple. I had some magnet strips at our house that probably would have worked fine but now that our little guy is into everything I wanted to make sure the magnets were too big for him to put in his mouth. I found the perfect solution on a trip to Staples, magnetic business cards. They came in a box of 50 and I found that cutting each card into 4 pieces made the perfect size magnet. The cards already had a white paper cover on the front which worked well for writing the words right onto with sharpie. 


Once I had written all the words onto the magnets we put them on the fridge. So far they have been a huge hit in our house. The Bee can read all the words and likes putting them together to make sentences and stories. The Bean is starting to recognize a lot of the words and the little guy thinks taking the magnets on and off the fridge is super fun. I am thinking over time we will add more words and maybe swap some out from time to time too.


Monday, January 12, 2015

171) Don't Forget Backpack Tag


The return back to our school routine after the winter holidays felt hard this year. After two weeks home, most of which was spent in our pajamas since we all had a bug, getting back to the get up and go was tough. It has been made even tougher by all the wintry weather around here, causing our return to be more stop and go then smooth sailing. I don't know if it is the stop and go or all the added winter gear but there has been a slip back into forgetting stuff at school. So to help I went back and made the Bee another reminder tag for her backpack. I originally made one for her in the Fall when school first started. She was having a hard time getting into the routine of first grade and the reminder tag on her backpack really seemed to help. It was mostly her water cup or her lunch box that would get left behind in her locker, so having the tag on her book bag was sort of like a little checklist of what was supposed to go in before the trip home. Her first book bag bit the dust and I learned my lesson that a good backpack is worth the investment. So now with what is hopefully a better backpack, I made her a new tag in hopes that the reminder will help again.
.

Since I figured this is probably a pretty common problem I thought I would share the tag design for anyone else who wants a copy. All you have to do is follow the link below, either print right from the document or download a copy to print later. Cut out both sides of the tag and glue the tags back to back with a glue stick. With a hole puncher make a hole. Then have your child write their name and class and decorate their tag however they want. If your child is as hard on their backpack as mine is you might want to laminate the tag. I have had great luck with those non-heat laminating pouches but you could also use just clear contact paper. I also printed my tag on a heavy card stock to help it hold up a little longer. If you download and use the tag let me know if it helps at all. I am curious to see if others find the tag to be as helpful.


Download the Don't Forget Back Pack Tag here


Wednesday, October 8, 2014

27) Apple Cider Slush


This weekend we made our first trip to Weber's Farm, one of the girls most favorite Fall visits. Top on the girls list to do there are the hayride, the giant slide and choose a pumpkin. Top on my list are apple cider donuts and apple cider slush's. Some people like pumpkin spice but for me Fall doesn't really start till I get to have an apple cider slush. The only down side to the apple cider slush is that is is only available in the Fall and to be honest I kind of want apple cider slush's during the other 3 seasons too. 


A few weeks ago my friend told me about how she and her son had made homemade lemonade slush's just using lemonade and their ice cream maker. She said it was so easy (she was 9 months pregnant at the time and looking for fun easy things to keep her boys occupied) and they were delicious. As delicious as a lemonade slush sounded all I could think was " I wonder if it would work with apple cider?"
                                                                                                                                                                             

It did!! She was right, so easy! All we did was pour most of a half gallon jug of apple cider right into our frozen ice cream maker (We have a Cuisinart Ice cream maker but really probably any would work) and turn it on. After just a few minutes it looked like a slush. I'm not sure why but I was expecting it to take longer and was in the middle of making dinner when the slush's seemed done. So i let the machine run a little longer and then turned it off. After dinner the slush's were perfect and everyone in our family agreed that they were as good as Weber's. Our littlest pumpkin is going to be 1 next week (I cant Believe he is 1 already) and I was thinking apple cider slush's might be a perfect October birthday party treat.


Friday, August 1, 2014

86) Acorn Hill Playground at Robert E. Lee Park


It's been a few years since our Playground Tour and while we still spend plenty of time at the playground, we mostly visit the same few favorite spots. I had kinda of forgotten the excitement of checking out a brand new playground until a brand new playground opened just a few miles from home. The Acorn Hill playground opened in June at Robert E Lee park and we finally had a chance to check it out. The girls gave it an imediate two thumbs up. The playground has a great sand pit, cool climbing equipment, little structures to play in, swings and the coolest wooden blocks we may have ever seen.


To get to the playground you take the Falls Road entrance to Robert E Lee Park (first right after Pepe's Pizza if you are headed north on Falls) and follow the main driveway down to the Robert E Lee main parking lot. After parking you follow the driveway back to the bridge that crosses the dam and follow the path up the hill. The playground sits at the top of the hill with a great view of the reservoir. It also has a great breeze, which I was very thankful for on the hot day we visited. The playground is mostly shaded, another huge bonus on a hot summer day.Acorn Hill has been a definite new favorite and one which I think will probably become one of our new regular hang outs this Fall.


Wednesday, June 25, 2014

27) Strawberry Yogurt Popsicles


There are a few things we do every summer without fail, swimming, trip to the beach, visiting our favorite gardens and maybe most importantly berry picking. We usually make several picking trips a year with either cousins or friends but my most favorite is picking strawberries. Mostly because it seems like summer doesn't really start till we do. This year was the little brothers first trip. He happily sat in the field desperately trying to reach the ripe red strawberries just out of his reach. Finally just before we left he got one, stuck it right in his mouth and gave me the most satisfied look as red juice streamed down his chin. Success. Needless to say his sisters ate more then their fair share as well. Despite the pick one, eat one technique that generally seems to be implemented by all kids picking berries we still managed to pick 8lbs of strawberries!


We brought the strawberries home, filled our kitchen sink with warmish water and a splash of vinegar and let the strawberries soak in the bath. The strawberry bath was something I learned at a Mesh Baltimore class I took last year and the girls thought bathing strawberries was both silly and awesome. After the bath we divided up the strawberries. A bulk of them were cut and frozen for smoothies and other things throughout the year. Eating fresh June strawberries in February is one of those things that I love on a day when I feel like I just can't take winter anymore. We put a small bowl of strawberries in the fridge to be eaten right away and set aside an additional pint to make Strawberry Yogurt Popsicles. Every year we try out some fun strawberry recipe. We have made ice cream, jam, and even soap. So a few days before our picking, when I saw a recipe for the Strawberry Yogurt Pops on the Kitchn's instagram I knew it was a recipe we would most definitely need to try out.


The recipe only calls for a few ingredients:
1 pint of strawberries
1/3 cup of sugar (you could probably do honey if you didn't want to do sugar)
lemon juice
1 cup of yogurt (we used vanilla Greek yogurt)

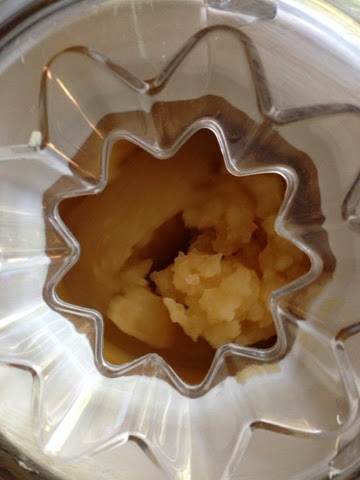
The Popsicles were very quick and easy to make. Honestly the girls did a lot of it. We started by cleaning and slicing a pint of strawberries. We then added 1/3 cup of sugar to the strawberries and a little lemon juice and let them sit in a bowl for 20 minutes to macerate. After 20 minutes we took the strawberry mix and poured it into the blender and blended it up just to break the strawberries down a bit. If your strawberries were ripe enough you might be able to just smash them with a fork a bit and have slightly chunkier fruit pieces. We then poured the blended fruit back into the bowl, stirred in the yogurt and poured the mix into our Popsicle molds. A few hours in the freezer and they were ready to sample.


If you read the list of ingredients above you already know these were delicious. There was really no way to go wrong here and the girls have been eating these almost every night. I am hoping to pick some blueberries in the next few weeks. I see blueberry yogurt pops in our future.


Tuesday, May 13, 2014

172) Cardboard Roll Flower Printing


After this past Winter we could not be happier to finally be enjoying Spring around here. We have been spending most of our time outside, at the playground, talking to neighbors we haven't seen in months, picking flowers and not wearing shoes. It has been lovely! We have however had quite a bit of rain, so on one of our rainy afternoons I saw this simple cardboard roll flower printing project on Treehouse Kids and Crafts Instagram feed. Five minutes later we were making our own printed flowers. I love this kind of project that can literally be set up in a moments notice.


All you need is some cardboard rolls, we used a few toilet paper rolls we had in the recycling bin, tempera paint, paint brushes and paper. I started by taking the cardboard tubes and cutting slits on one end of the tube to create the petals. The first tube I just did straight cuts and bent them back, the second tube I cut more of a petal shape, but they both worked well. The girls then took the cardboard tubes and dipped the flower petal end into the paint and stamped the tube onto the paper. Both girls really liked this project. The Bean is always a fan of stamping, but she particularly seemed to like this one. Once they had stamped a few flowers, they used brushes to go back in and add stems, grass, more petals, leaves and more.


Both girls painted several papers, always the sign of a good project. The flowers were so simple and turned out beautifully. I also loved seeing how both girls used the same stamps to create something so individual and unique. Watching how they put their own spin on the project was definitely my favorite part. A nice way to spend out April shower making May flowers.


Thursday, May 8, 2014

171) Rolled Paper Beads


If you are a mom we know in real life you might want to hold off on reading this post until after Sunday or just act surprised when we give you one of these necklaces for Mother's Day. The last few weeks we have been spending some rainy afternoons making these fun and easy to make paper beads. Each bead only takes a few moments to make so over the course of a few afternoons, even with the relative short attention span of a 3 and 5 year old, we have been able to make enough beads for a few necklaces. We are now starting to work on turning these beads into necklaces as presents for all the mothers we love for mother day.


The idea for the beads came from Martha Stewart's Crafts For Kids book, which Is filled with tons and tons of awesome kid projects! We have only tried a few from this book but there are so many projects in there that I can't wait to try. To make the beads we used:
Colorful paper cut into 1"triangles
Glue stick
Drinking straws

I started by cutting some colorful paper into 1" wide long triangles. We used a Kid Made Modern paper from Target but you could also use an origami paper, or even old kid drawings/paintings work for this project. I used a paper cutter to cut the triangles making sure the wide end of the triangle was 1" wide but you could also cut the paper with scissors. 


Once the papers were all cut I showed the girls how to rolls the beads. Placing the pattern side down, we started with the wide side of the triangle closest to them. They then placed a plastic drinking straw on the paper and slowly rolled the straw and paper away from them. When the paper was mostly wrapped around the straw they used the glue stick to put a little glue on the end of the triangle before rolling the rest of the triangle up. Once the paper was entirely wrapped around we pulled the paper bead off the straw and put all the finished beads into a bowl. The Bee had no trouble making the beads. After I showed her how to make the first one she was off making a bunch. The Bean took a few tries before getting the hang of it, but once she did I was impressed with how well she did. We now have a bowl full of paper beads and have started stringing them onto pieces of elastic to make some necklaces. I am hoping to get a few more done tomorrow so we can give them to all our favorite moms on Sunday.


We also made a few beads using triangles cut from the girls drawings. I loved the way these turned out and using their drawings made them seem so much more fun and personal. Not to mention a great way to use the ever growing stack of artwork we always seem to accumulate. I think the kid art beads would be perfect for Mother's Day.

Wednesday, April 30, 2014

91) Plastic Cup Stacking


It is a fact of parenting that we spend lots of money every year buying toys for children but without fail the best toys are always something that was never intended to be played with. A few months ago I did a major pantry clean out and came across a large stack of red plastic cups leftover from some previous party. I set the cups in the hallway as I cleaned out the pantry and came back to find that they had disappeared. When I looked in the next room I found the girls quietly playing together with the cups. The were stacking them on top of one another building a huge wall of cups. From that point on the cups have become one of the most favorite toys at our house. 


After months of playing the cups still remain a favorite. The girls love stacking, seeing how high, how long and how big they can stack. Wildly giggling when the cups finally topple. Sometimes pointing fingers and each other for knocking them down. They also like to build little houses and towers for their dolls. The cups make the perfect hideouts for their little characters. 


The cups seem to have endless possibilities and I love watching the girls come up with new ways to incorporate the cups into their play. All for the cost of $2.99, they might be one of my most favorite toys too.


Thursday, April 24, 2014

170) Lemon Print Wrapping Paper


I always get really annoyed with myself at this time of year. As soon as the weather starts to warm up I feel the need to clean the house. Every year when this happens I always wonder why I didn't do more cleaning all winter when I was stuck in the house. Why do I always wait till the weather is beautiful to start cleaning out the house. All of this is to say that while cleaning out the fridge I came across two long forgotten lemons in the back of the veggie drawer. Just as I was about to throw them out I thought maybe we could find something fun to so with them before they hit the trash can.


I cut the lemons in half and placed each half on plate with some different colors of tempera paint. We then pulled out a few pieces of large paper. The girls then painted each lemon half with a brush and then stamped the lemon on the paper. They were amazed at seeing the patterns the lemon left on the paper. The Bean was a little disappointed at first because she had so much paint on her lemon that the lines didn't show up. I showed her how to print the lemon with a little less paint so the lines would be clear. She then decided that she actually didn't want the lines to show up and painted back into the lemons she printed. But that how making art with three year olds goes. She was happy with it and who am I to say there is a right or wrong way to print lemons. 


The Bee on the other hand loved meticulously painting the lemons and carefully stamping them on her paper. Both girls stamped several large sheets of paper. We let the sheets dry and have been using them as wrap presents. The large sheets have made the perfect wrapping paper and I see us making more in the near future!